Christmas Cookies, Day 12: Italian Rainbow

Buongiorno e buona notte

Ah, Italy. I have zero Italian in my body. (Really, I did my DNA.) But in my heart, they are my people. The food, the beauty, the food, the language, the food. How could you not love an entire culture based on pasta, bread, and pizza?? And then there are the cookies. It seems that every time I come across an interesting Christmas cookie recipe, it’s Italian. Maybe they’re so good at celebrating Christmas because they’ve been doing it nearly the whole 2000 years.

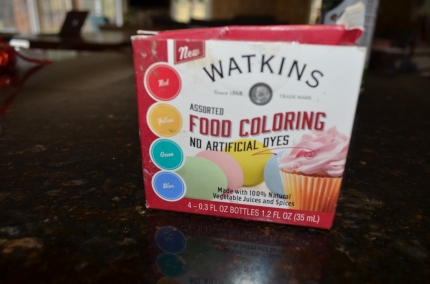
Speaking of Italy, the colors in this cookie are supposed to represent the Italian flag. We only use natural dyes, so it looks a little like Italy is celebrating breast cancer awareness by going pink-ish.

DSC_0020

This was undoubtedly one of the most interesting cookies I have ever made. It has a few steps, but they’re not too difficult or time consuming. And if you buy almond paste, you would automatically save a step. I had only almond flour, so I had to make my own.

First combine the butter, almond paste, egg yolks, and sugar. Cream until light and fluffy. In a clean bowl, whip egg whites to soft peaks. Fold into the batter. (The batter will be stiff, so you may really have to work to get everything folded.)

In the meantime, prep 3 9X13 pans. Spray with cooking spray, then line with parchment paper. (If you don’t have 3 pans, no worries. These only take about 10 minutes to bake, so you can do them in batches.)

Divide the batter into two separate bowls. (About 1 3/4 C. of dough into each bowl.) Add green food coloring to one bowl, and red to another, leaving one bowl plain. Spread into the prepared pans. Bake until the edges are set and starting to turn golden. (Approx. 10 minutes.) It will begin to look dried out, that’s how you know it’s done.

DSC_0021

Invert the green (ish) layer, peel off the paper, and spread with the raspberry jam. Top with the plain layer, and spread that with the apricot jam. (I only had peach jam on hand. It turned out magnifico.

DSC_0023Add the red layer. Cover with plastic wrap, weight with a cookie sheet, and chill overnight.

The next day, melt the chocolate and spread it over the top layer. After the chocolate hardens, cut into tiny strips. I found it easier to turn it upside down to cut, that way the chocolate didn’t crack. Store in the refrigerator.

DSC_0026.JPG

Someone said the taste is complex, and I agree. The texture is somewhere between a cake and a cookie. The flavor picks up hints of almond, raspberry, chocolate, and butter. All in all, this is delicious, and I understand why those wise Italians love it so. I will definitely add it into my repertoire whenever I’m feeling fancy.

Italian Rainbow Cookies

1 1/4 C. almond paste

1 C. butter, softened

1 C. sugar

4 eggs, separated

2 C. flour

red & green food coloring

1/2 C. seedless raspberry jam

1/2 C. apricot jam

1 1/2 C. semisweet chocolate chips


Original Recipe:

https://marisasitaliankitchen.com/?s=rainbow+cookie

12 Days of Cookies, Day 11: Canele de Bordeaux

I NEED RUM!

I don’t drink. Occasionally I cook with alcohol, and when that happens I rely upon the kindness of strangers to help me, usually cornering someone in the alcohol aisle to ask which wine is dry. The first time I had to buy rum for a recipe, I happened to be extremely heavily pregnant. I waddled up to a guy in the booze aisle and said, “I need rum. Can you tell me which is the best to buy?” I’m pretty sure it’s the only time a guy loading 5 cases of beer in his cart ever looked at another person and thought, “You might have a drinking problem.”

The first time I had canele de Bordeaux was at Pistacia Vera, an amazing bakery in Columbus. They were almost indescribably delicious–a caramelized crust on the outside with custardy goodness inside. There was no way I could make them at home, or so I believed, until I began researching them. Turns out they’re little more than crepe batter plus rum. Special molds are needed, but these are worth it, and the silicone molds are relatively cheap on Amazon (15 bucks or so, depending on the brand or size. If you really want to commit, you can spend a few hundred on copper molds.) Believe me, if you like to bake, you will make these often enough to make it worthwhile.

The best part is that you can (and should) make the batter ahead of time and let it chill in the fridge for at least 24 hours, making this perfect for a Christmas breakfast. (Yes, I said breakfast. Cookies for breakfast; cookies for President; cookies for everything.) The ingredients are pantry staples (minus the rum), and the assembly easy.

First scald the milk and butter. Turn it off and add in the vanilla.

DSC_0015

While that cools a minute, combine your flour, sugar, and salt. Whisk the egg yolks into the dry mixture. This will be odd and crumbly, but that’s perfectly okay. Slowly add the milk in three batches, whisking well between so you don’t scald the eggs. Add the rum. It should appear like a nice, runny crepe batter.

DSC_0016

Chill overnight. The next day, preheat the oven to 450. (The high temp gives these their nice crust.) Traditionally the molds are lined with beeswax. Someday I want to try that, but, seriously, who has food-grade beeswax lying in wait? Second best is melted butter. Brush the molds generously with the butter and let them chill a few minutes while the oven is heating. When it is ready, fill the molds about 2/3 high. (They will rise, like popovers.)

Bake for 10 minutes at 450, then lower the oven temp to 375 and bake for another 45 minutes to an hour. They should be quite dark. Remember that’s caramelization and not burning.

Remove from the oven, turn the pan over, and unmold while still warm to prevent the resulting steam from softening your crispy exterior. (They will appear quite brown, but that’s what you want. It’s caramelized, not burnt.)

If you butter your molds, these are best eaten on the day they’re made. (That shouldn’t be a problem.) If you use beeswax, that buys a few days shelf life.

20191215_082354

Mine should have baked longer– I rushed them a bit. But the caramelization that was there was delightful, and the inside was sweet, custardy goodness.

20191215_093322

If you make these, I promise you will love them. Now enjoy your fancy French delicacy, you accomplished patissier.


Original recipe:

https://chefiso.com/p/canneles-caneles-recipe/

12 Days of Cookies, day 10: Jam-filled Snowballs

I love snowball cookies. Sometimes they’re also called wedding cookies. (Has anyone ever actually seen them at a wedding? I haven’t, but I’d like to. Please invite me to your cookie-filled wedding, is what I’m saying.) When I saw that these were jam-filled, I knew I had to try.

The recipe is a standard shortbread, with the addition of pecans. That means there are no leaveners and no eggs to make them puff or spread. Ideally they should stay in a ball, but I was a bit nervous about that because I would be inserting jammy liquid and sugar in the middle.

To get started, cream the butter and sugar together until light and fluffy. Add the vanilla and milk, followed by the flour, salt, and pecans. (Try to coat the pecans with the flour, this will help them distribute evenly.)

It will look quite crumbly after it is mixed, but that’s okay.

DSC_0017

Plop it onto some plastic, squish it into a ball with your hands, and chill for at least an hour.

DSC_0018

After the dough is thoroughly chilled, pinch off a bit and flatten the middle with your thumb, as if you’re making a bird’s nest. Put about a half teaspoon of strawberry jam into the center (enough to fill the nest.) With your other hand, pinch off a little more dough, shape it into another empty nest, and top the jam-filled nest. Press the seams together, and roll them into a ball.

DSC_0022

After all this handling, the dough started to warm up a bit. I sensed another chill was needed, so I popped them into the freezer for about 5 minutes.

Bake in a 400 degree oven for 10 minutes. You can see that mine spread a smidge, likely because of the jam centers, but I’ll take it. (Should we call them snow plops now, instead of snow balls?)

DSC_0024

As soon as you get them out of the oven, carefully and quickly drop them into a bowl of powdered sugar. Because these were delicate (and not round), I set them into the bowl and heaped sugar around them, rather then rolling them in the sugar.

After they cool for 30 minutes, they may need another coating of powdered sugar. (Mine did.)

These were a delight, and it’s fun to find a surprise inside. Next time I’ll double the recipe, it didn’t make nearly enough.

DSC_0025

Jam-Filled Snowball Cookies

1/2 C. butter, softened

1/4 C. powdered sugar

1 1/8 C. flour

pinch salt

1/2 tsp. vanilla

1 T. milk

1/2 C. chopped pecans

1/4 C. strawberry jam


Original Recipe:

christmascookiesblog.blogspot.com/2014/12/jam-filled-snowball-christmas-cookies.html


12 Days of Christmas, Day 9: The Very Best

Really? Really, Really?

The one thing Elf and I have in common, besides our savvy fashion sense, is a willingness to believe people when they say something they’ve made is the best.

coffee-Elf

I can’t begin to tell you how many recipes I’ve tried for rolls, chocolate cake, and chocolate chip cookies all claiming to be the best. Lies, I tell you, lies. So when I came across yet another recipe for sugar cookie cutouts claiming to be the best, I was skeptical. And yet, they had me at “the best.” So I gave it a try.

This particular cookie purports to be better than others because it 1. Doesn’t need to chill. 2. Rolls well. 3. Keeps its shape after it bakes.

The recipe itself was interesting, containing only butter. (Previous attempts at all-butter pie crusts have taught me all butter does not equal happy rolling.) It also contained buttermilk. Hmm. No chilling. All butter. My skepticism is bordering on cynical.

I followed the recipe exactly and didn’t chill. How did it roll?

20191212_201439

Like a dream! I mean, seriously amazing. It’s pillowy soft and supple, no flaking or falling apart. The best part? The recipe’s inventor suggested rolling it in powdered sugar. Genius! And when it baked, it melted into the dough, erasing all signs of the white powder you see in the picture.

How did it cut, you ask? (Okay, you probably didn’t.)

20191212_202943

Perfectly! (The sweaters were made with cheap, plastic cutters, but the good metal cutters worked beautifully.)

Yes, but HOW DID IT BAKE?? Did it keep its shape? After all, cookie experts tell us dough must chill in order to keep its shape.

20191212_211437

Ta-da! The shape held. Now about the taste. They’re pretty good, like sweet little biscuits. They don’t trump my favorite Betty Crocker recipe, the one I’ve been using the last two decades. BUT. Those cookies have to chill. They’re a little fussy, and sometimes they flake. And they only make two dozen. THESE cookies can be made quickly, make three dozen or more, and–with icing–are really quite tasty. So there you go. If you want the taste and appearance of cut out cookies without the fuss, then this really is your very best recipe.

(I didn’t frost the cookies because they’re for my daughter’s Christmas party. She and her friends will frost them later.)

Best Cut Out Sugar Cookies
1 1/2 C. sugar

1 C. butter, soft

2 eggs

1/2 tsp. salt

2 tsp. baking powder

1/2 C. buttermilk

1 tsp. vanilla

1/2 tsp. almond extract

4 1/2 C. all purpose flour

Cream sugar and butter together until light and fluffy. Add eggs, one at a time. Add salt and baking powder, followed by extracts. Add half of the flour, followed by half of the buttermilk, followed by the remaining flour and milk. Roll out in powdered sugar to desired thickness and cut. Bake at 400 degrees for 10-12 minutes.

Original recipe:

Best Cut Out Sugar Cookie Recipe

12 Days of Cookies, Day 8: Puppy Chow

Happy Accidents

I bet you thought peanut butter was invented by George Washington Carver. I did, until I started researching for this post. It turns out that, while GWC was the talented go-to guy for most things peanut, peanut butter was a more collaborative effort. In the US, the peanut butter person was none other than Kellogg. (Remember him, the Cornflake guy?) He innovated it as a protein for elderly people who couldn’t chew well. The closer I get to not being able to use my teeth properly, the more thankful I become for his forethought. I love, love, love peanut butter. Even at the height of hideous morning sickness, it was the one thing I could eat and keep down, my solid comfort and very good friend.

Do you remember that old commercial, “You got your peanut butter in my chocolate, you got my chocolate in my peanut butter.” I have no idea who first combined the two. Maybe the ancient Incas or Aztecs, since they were the first known culture to grind peanuts into a paste, and they definitely loved their chocolate. Whoever made the discovery, I owe them a debt of gratitude, too.

And the lady over at Cookies and Cups who put this snack into cookie form. Genius. I love you.

These cookies are pretty standard, creaming, adding dry ingredients, baking. The extra steps come at the end when you dip them in a chocolate mixture, followed by powdered sugar, just like one of my favorite snack mixes. I call it puppy chow. Some people call it muddy buddies. (I like to try to work puppies into everyday conversation whenever possible.)

I made the cookies small, both because I knew they’d be rich and to allow for maximum chocolate/powdered sugar ration. Pinch a generous amount of dough, roll it into a ball, and flatten slightly with your palm. (Don’t flatten all the way. The baking soda will do the rest. Baking soda makes things spread; baking powder makes them puff.)

20191212_125248

After they baked for 10 minutes at 350, I let them cool and then covered them with the chocolate mixture. The original recipe suggested dipping them, but I found it easiest to spread each side with a thin layer of chocolate, drop them into the powdered sugar, and give each side a little pat to make the sugar stick. Aren’t they adorable?

20191212_144651

They taste remarkably like the original, minus the crunch. Next time I make them (and I WILL make them again), I might use crunchy peanut butter. And I might double because it made less than three dozen, even when made small.

Puppy Chow Cookies

1/2 C. butter, soft

1 C. peanut butter

1/2 C. granulated sugar

1/2 C. brown sugar

1 egg

1 tsp. vanilla

1 tsp. baking soda

1 tsp. salt

1 1/4 C. all purpose flour

Topping:

1 1/2 C. semisweet chocolate chips

1/3 C. peanut butter

1/3 C. butter

2 C. powdered sugar

Cream together the butter, peanut butter, and sugars. Add egg and vanilla, followed by the dry ingredients. Roll into small balls and place on prepared cookie sheets. Press with your palm to flatten slightly. Bake at 350 for 8-10 minutes or until edges are set. Allow cookies to cool completely. Combine the chocolate chips, remaining peanut butter and butter in a glass bowl. Heat in the microwave in thirty second increments until melted and smooth. Top cooled cookies and cover with the powdered sugar.

Original recipe:

https://cookiesandcups.com/puppy-chow-cookies/

12 Days of Cookies, Day 7: Lebkuchen

Lebkuchen, a leblabor of leblove

I’m no expert in German, but I believe “lebkuchen” translates roughly to “cookie that takes 1,000 steps.” So how did I come to make them in the midst of an unusually busy week? Because 22 1/2 years ago I married a man who loves books. Old books, to be exact. The obscure kind that most sane people (people like me) get rid of and donate to our local library thrift store. This is how you know God has a sense of humor, because He pairs the two most opposite people possible and makes them live in the same house for decades. Don’t get me wrong, I love books. But, being pragmatic and utilitarian, I only want to own the ones I know I’m going to use or read over and over again. My husband is on a mission to SAVE ALL THE BOOKS!!

Last year when he giddily arrived home from the thrift store with a cookbook, I inwardly rolled my eyes. (And probably outwardly, too.) This was a book from the ’70’s, all script, no pictures, you know the kind, where you expect to find a recipe for salmon aspic or some other monstrosity people of my birth decade thought amazing. This book was filled with recipes for traditional German cookies. That otherwise might have intrigued me, except that a few years ago we went to a traditional bakery in German Village and loaded up on German Christmas cookies and they are, hmm, not my particular taste. One of the recipes called for black pepper, if that gives you any indication. But my husband has been pleading with me to make lebkuchen since he bought the book, so what’s a girl to do? I compromised by telling him I would make them, but only with a recipe I found on the internet, hoping for some sort of modern update.

Instead I found that there are no shortcuts when it comes to lebkuchen, apparently. So if you want to make these, plan in advance because there are a few steps. First I had to make the candied citrus peel. (This might be something that is sold in your area. I live in a rural area that thinks jalapeños are exotic. Strangely, it’s a huge Amish enclave. You’d think they would use a lot of candied citrus peel like their forebears, but as far as I can tell from their carts at Aldi, their forebears apparently used a lot of shortening and saltine crackers.)

20191211_121624

I used a vegetable peeler to shave one orange and two lemons, then boiled the peels for about 15 minutes. After that I transferred the peels to a sugar syrup (equal parts sugar and water) and let them simmer for about an hour. After that, I let them dry and then minced them. (They were sticky. Ideally I would make them a day or two ahead of time and let them dry completely.)

After I removed the peels, I blanched the almonds in the still-boiling water, then set them to drain on a paper towel and peeled the skins off.

20191211_123642

Neither of these things was difficult to do, but both to some advance prep and planning time.

The third fussy thing you need to do in advance is clabber the cream. (Clabbering is what you call it when you add an acid to a milk product, like when you make homemade “buttermilk” with vinegar and milk, as I do incessantly because most people haven’t had buttermilk in the fridge since 1920.)

Combine 1 C. heavy cream with 1 T. vinegar (in a glass bowl, vinegar is reactive), and let it sit for 30 minutes. (Nerd alert: I think heavy cream is beautiful.)

20191211_125634

Once everything is clabbered, candied, peeled, and blanched, it becomes a normal recipe. Except there are no eggs, and isn’t that interesting? And it contains almond flour, curiouser and curiouser.

To begin with, cream together the butter, brown sugar, and molasses until it is well mixed and fluffy. Add the cream and mix just until combined. Next add all of your dry ingredients and the candied peel. Scoop onto prepared baking sheets and top with almonds. The original recipe called for topping each cookie with 3 almonds in a star pattern, but it also only called for 1/3 cup of almonds. I topped each cookie with one almond and pressed down lightly. (No need to flatten all the way, a little will do.) Even using only one almond, I had more cookies than nuts. (This is okay with me because I don’t love nuts in cookies. If you do, feel free to blanch more. I would think about a cup would do.)

Bake at 325 for 15 minutes. Here is a photo of the bald, baked cookies.

20191211_142047.jpg

And here they are glazed:

20191211_153828

The verdict: Are lebkuchen worth the extra time and effort? So much yes. I will definitely make these again, only next time I will blanch more almonds because, though I don’t usually enjoy nuts in cookies, they were the perfect addition to these old-timey Christmas treasures.

Lebkuchen

1 C. heavy cream

1 T. vinegar

4 C. all purpose flour

1/2 C. almond flour

1/4 C. minced candied orange peel

1/4 C. minced candied lemon peel

1 1/2 T. cinnamon

1 1/2 T. ground cloves (I omitted because I didn’t have and that’s a bit much for my tastes)

1 tsp. ground allspice

2 tsp. ground ginger

1 tsp. baking soda

2 tsp. nutmeg

1/2 tsp. salt

2 C. brown sugar

1/2 C. butter

1/2 C. molasses

1/3 C. blanched, whole almonds

Glaze:

2 1/2 C. powdered sugar

5 T. milk


Original post:

Lebkuchen-German Christmas Cookies

12 Days of Cookies, Day 6: Cinnamon Biscotti

Biscotti, Enrico Biscotti

A few years ago, my sisters and I took a class at the culinary institute in Pittsburgh where we learned how to make cream puff swans.

swans

That was actually a side note to our real purpose–checking out bakeries. We landed in the Strip District, sort of a mini version of the Lower East Side of Manhattan, without the rotting fish smell and high probability of ending up on a milk carton.

There’s this delightful bakery there named Enrico Biscotti and, in a stunning coincidence, he actually makes biscotti.

biscotti

I love biscotti. It’s the perfect crunchy, less-sweet antidote to all the soft and gooey Christmas goodness right now. It couldn’t be simpler, and the formula is always the same: mix, bake, slice, bake. The twice bake ensures the crispy exterior, as well as assuring a long shelf life.

Cream the butter and sugar, add the egg and yolk, and vanilla, followed by the dry ingredients.

Don’t be alarmed if your mix looks like this:

20191210_143126

Just dump it on your prepared pan and shape into a 12X3 inch log with your hands, pressing with the heel of your palm. Brush with the reserved egg white, and sprinkle with a generous amount of the sugar/cinnamon mixture. (I had a lovely picture of the pre-baked log, but accidentally deleted it because I have the tech capabilities of a llama.) Here’s a picture of the baked loaf.

20191210_155215

After the log has baked 45 minutes, remove it and slice it while still warm. Slice one inch pieces on the diagonal and place them, cut side down, back on the baking pan. Dust with more sugar mixture. (Using a serrated knife helps this process immensely.) Here’s a picture post-slicing. I cut mine slightly thick because I like them a tad on the soft side. If you’re a fan of super-crunchy biscotti, feel free to slice them thinner.

20191210_155501

Bake another 15 minutes.

These biscotti are a delightful dessert, snack, or even breakfast. They will definitely be going on my “will repeat numerous times” list. I hope you enjoy them, too!

20191210_161435

Cinnamon Biscotti

6 T. butter, softened

1 C. granulated sugar

1 egg plus 1 egg yolk (reserve white for topping)

1 tsp. vanilla

1 tsp. baking powder

1/4 tsp. salt

1 tsp. cinnamon

2 C. all purpose flour

Topping:

reserved egg white

1/4 C. granulated sugar

1 tsp. cinnamon

Original post

Cinnamon Sugar Biscotti

12 Days of Cookies, Day 5: Frosted Orange

Oranges Have Vitamin C And These Cookies Are Health Food

Shocking surprise: I like bakeries. This seems out of character for me, I know, but it’s true. I’ve been to 47 states, stopped at bakeries in each, and encountered some amazing treats–rhubarb pie in Custer, SD and the most amazing chocolate chip macadamia cookies in Big Sur, CA, for instance. Recently while traveling through Virginia, someone recommended a stop at Blackbird Bakery in Bristol. It didn’t take a lot of convincing, especially because it was on our way and required only a tiny detour.

It was still relatively early in the morning, so doughnuts were definitely in order. Truth be told, I’m not a huge doughnut fan, having been spoiled by the best doughnuts in creation at, Schuler’s, my hometown bakery in Springfield, OH. Here’s a picture of their chocolate covered cream filled doughnuts, so you understand where I’m coming from.

73194944_2733847046638658_3344068919714381824_o

*wipes drool off keyboard and continues*

Anyway, I wasn’t expecting much from the Blackbird Bakery, so I ordered a glazed doughnut with orange frosting. It. Was. Amazing. So simple, but so good. Ever since then, I’ve been craving orange things. (It’s either because the doughnut was so good or I have scurvy. Not sure.) In any case, I’m extremely excited about today’s frosted orange cookies.

Did you grow up in a part of the country that received Archway cookies?

8229f2007f84dd774b011420ae7b4638

My dad didn’t like store bought cookies, but Archway was the exception because they tasted homemade. I was hoping today’s cookies would taste like those.

I don’t usually make a lot of modifications to recipes on the first try, but this recipe I changed in three ways: the first was to change from coconut oil to butter. I know coconut oil is supposed to be a superfood now, but I find it yak, especially in cookies. The second was to add a bit of orange extract to give the cookies a bit of extra oomph, and the third was to chill the dough. Every time a cookie recipe has a high ratio of flour, it’s a signal to me to chill the dough. Why? This allows the flour time to absorb the liquid in the recipe, thereby giving your cookie a better, mellower flavor. Otherwise it might taste like raw flour, ew.

I changed the frosting completely, opting for a glaze instead of a buttercream as directed. This was mostly due to the fact that I still had the doughnut’s orange glaze on my mind, feel free to use either, as I’m sure both would be delightful.

Side note: whenever I use orange extract, I add it directly to the sugar. I don’t know if I read somewhere that this helps the oils in the extract somehow or it’s merely my imagination that it makes things taste more orangey. Either way, it’s what I do. And this orange extract is fabulous, full orange flavor with no bitter aftertaste.

20191209_120223

The finished cookies, while not the orange-filled goodies of my dreams or memory, are still a nice, old fashioned sugar cookie with a hint of orange, a definite welcome in the season after the recent overload of chocolate and toffee.

20191209_150957

Old Fashioned Orange Cookies

2 C. granulated sugar

1/2 tsp. orange extract (optional)

1 C. whole milk

1/2 C. butter

2 eggs

1/3 C. prepared orange juice, or juice from one orange

1 tsp. baking soda

1 tsp. baking powder

1/4 tsp. salt

4 1/2 C. all purpose flour

Orange glaze:

1/3 C. butter, melted

3 C. powdered sugar

2-3 T. orange juice (more or less depending on how thick/thin you like your glaze)

1/4 tsp. orange extract

pinch salt

Cream together butter, sugar, and extract. Slowly add in eggs, followed by milk and juice. Add remaining dry ingredients. Chill dough at least an hour. Roll into balls, place on cookie sheets prepared with either parchment or Silpat, and flatten slightly with the palm of your hand. Bake 8-11 minutes until edges are set. Frost when cool.


Original Recipe

orange cookies

12 Days of Cookies, Day 4: Toffee

Toffee Vs. Caramel, the Ultimate Smack Down

I love them both, but what exactly are they? Here in the US, they mean different things to each other, just as they mean different things in other parts of the world. For our purposes, I’m going to concentrate on what we North Americans mean when discussing the two.

DSC_0715

In the most technical terms, if you looked at each under a microscope, you would see that the sugar crystals are different. Toffee’s crystals are shorter, (does Toffee Crystal sound like an exotic dancer to anyone else?), meaning they break and snap easier, while caramel crystals are longer and more malleable. This is because toffee is cooked to a higher temperature (300) while caramel stays at a lower 248. Also, toffee contains two ingredients: butter and sugar, while caramel is enhanced with milk, cream or (my personal favorite) sweetened condensed milk. (There is literally nothing sweetened condensed milk can’t make better. Except maybe obesity.)

Back to the cookie. When I was in high school, my friend, Jeff, worked at the Blue Chip cookie company at the mall. One Christmas he brought me a bag of reject cookies, and it was like winning the lottery, only better, because cookies. Tucked inside the treasure bag was something I’d never had before: toffee cookies. They. Were. Amazing. Jeff remains one of my favorite people ever. Coincidence? Maybe. The point is that toffee is amazing in any form but, shockingly, I’ve never made toffee cookies before. Maybe I was afraid they wouldn’t live up to my memory of those long ago cookies. Whatever the reason, it was high time I tried some.

The recipe itself couldn’t be simpler: butter, sugar, vanilla, flour, and a bag of toffee bits. The key is in the chilling, I think. Letting the dough rest allows the flavors to blend and take on an almost toffee-like aura on their own. The entire bag of Heath bits doesn’t hurt, either.

These cookies were awesome. I would make them again, and I wouldn’t change a thing.

20191207_174019

Toffee Cookies:

1 C. Butter, room temp

1 1/2 C. granulated sugar

2 eggs

1 tsp. vanilla extract

2 1/2 C. all purpose flour

1 tsp. salt

1 tsp. baking soda

2 C. chopped toffee (an entire bag of Heath bits)

Cream butter and sugar together. Add eggs and vanilla, followed by the dry ingredients. Chill for at least an hour. Roll into balls and bake in a preheated 3350 degree oven 11-13 minutes until edges are set.

Original recipe:

Toffee Crunch Cookies

12 Days of Cookies, Day 3: Chewy Cornflake Marshmallow

Christina Tosi

If you know who that is, you and I could wear matching “Best Friend” necklaces. If you don’t know who that is, let me enlighten you. There are a lot of cooking superstars. I could list ten off the top of my head. But there are no baking superstars, save one: Christina Tosi.

A few years ago she opened Milk Bar in New York City. It went off like an atomic bomb in the baking world. Everything was so new and different and exciting! Bald cakes! Cereal milk! And seemingly everything contained Cornflakes, for reasons only known to her. Here’s a picture of her, keeping the corn industry alive and kicking.

milk

Here’s where things take a downward turn. After pouring over her cookbook, I tried multiple recipes and they all turned out…meh. Granted, I have yet to try her most famous and iconic recipe, the Milk Bar Pie (formerly called Crack Pie until the PC police came along and pressured her to change it.) The main reason I never tried this pie was because I lacked access to freeze dried corn powder, (?) and that was when it hit me: these recipes were not created for the home cook. They were created for pastry chefs in New York who have access to supplies and techniques completely foreign to me. So I appreciated it when I found one of Christina’s other iconic recipes (for Cornflake cookies) that had been adapted for the home chef. Today’s recipe comes from Sweetest Menu, link to follow at the end of the page.

The two things to know about this recipe are that the Cornflakes have to be toasted and the dough has to be chilled.

To toast the flakes, I spread them in a pan and put them in a 300 degree oven for 13 minutes, watching closely, lest they burn.

DSC_0713

I always feel a bit guilty that Kellogg invented Cornflakes as a health food, and we’ve repurposed them to stuff into cookies. (Another favorite application is to cover chicken tenders that have been dipped in seasoned mayonnaise, but that’s another unhealthy post.)

DSC_0714

Isn’t that a yummy looking dough? All those plump little marshmallows, begging to be devoured. Plan ahead because it needs to chill at least an hour. Speaking of health food, did you know marshmallows also started out as medicine? That, going as far back as ancient Egypt, people used the root of the mallow plant (one that grew in marshes) to make treats and heal sore throats? They were even a favorite tool of Hippocrates, used to treat blood and tissue wounds. (Confession: I’m kind of a food history nerd. Here’s a picture of a mallow plant for my fellow nerds:)

Health-benefits-of-Marshmallow

The only change I made to the original recipe was to add salt. Everything needs salt, especially things with so much sugar. The flavors tend to overlap and become dull. Salt adds a much-needed spark.

DSC_0716

The cookies are gooey, rich, and delicious, but they didn’t make many (17 large.) In the future, I would likely double the recipe.

Chewy Cornflake Cookies

1 1/2 C. Cornflakes, toasted

1/2 C. butter, room temp

1/2 C. granulated sugar

1/2 C. brown sugar

1 tsp. vanilla extract

1 egg

1 1/4 C. all purpose flour

1/2 tsp. baking soda

1/2 tsp. kosher salt

1/2 tsp. cinnamon

1 C. mini marshmallows

1 C. chocolate chips

Spread the cornflakes in a single layer on a sheet and toast in a 300 degree oven for 13 minutes. While cooling, cream butter and sugars together. Add vanilla and egg, then remaining dry ingredients, followed by the chips, mallows, and flakes. Chill at least one hour.

Bake on cookie sheets prepared with either parchment paper or Silpat (I need an I heart Silpat t-shirt), 350 degrees for 8-11 minutes or until edges are set. Allow to cool before removing, cookies will spread and become gooey.

Original recipe:

Chewy Cornflake Marshmallow Cookies