Valrhona Chocolate Cookies With Reese’s Peanut Butter Chips

When I was fourteen, I was grounded from Cadbury eggs. Not because I misbehaved, but because I ate so many. (They’re seasonal. SEASONAL!)

Image

Unfortunately for my well-intentioned mother, I was already adept at sneaking and hiding food by this point. I slipped my friend, Allie, a fiver, had her buy enough eggs to last all Easter, and hid them in my sock drawer.

Hiding and sneaking food were techniques I perfected early in life. Like most families with multiple children, we were competitive about food. Did your family have a Little Debbie rule?

Image

Ours was that each kid got one per day if you ate your supper. This worked until my oldest sister went to college. I was eight. It didn’t take long for me to figure out that no one was accounting for her absence; that extra Debbie was up for grabs! So every day I took it, went into the bathroom, locked the door, and turned on the water. (The water covered the sound of the wrapper. To this day when I wash my hands, I crave Fudge Rounds.) After I ate my bounty, I lifted some trash and buried the wrapper beneath it. (The trick was to get it in the middle; if you put it on the bottom, then Dad would spot it when he emptied the can.) Is it any wonder I dreamed of being a spy when I was a child? Thanks to forbidden food, I was well on my way already.

When I left home for college, there was no one to care what I ate or when. It was a glorious time at first, but I began to miss those halcyon days of sneaking around. What’s the point of being bad if there’s no one to catch you at it? At this point you probably think I’m some weirdo with unhealthy food compulsions. I’m glad to see I’ve presented myself clearly. The point is that there are still some foods I hide from myself. This is one:

I love cookies. Who doesn’t? Nazis, maybe, and other morally questionable unsavories. Most people, especially most Americans, love cookies. (One would think there is no way to make cookies better, but the Brits do it by calling them “biscuits.” I wish we did that; it’s like everyone is a puppy–so cheerful!) I discovered this particular recipe when my husband and I were newly married. Originally, the recipe was for double chocolate cookies. Somehow–divine intervention, perhaps–I had the brilliant idea to substitute peanut butter chips for the chocolate, and, ta-da! an addiction was born.

Is there anything those two can’t make better? I submit that there is not.

This is the first time I’ve made the recipe with Valrhona cocoa powder, (for more about Valrhona, see my post on Milk Bar’s chocolate malt cake)but I always use Dutch process. (The Dutch process makes a darker, richer final product.) The key to this recipe, and to all cookie recipes, is to chill a few hours or overnight. Why? I have no idea. I just know it makes them bake and taste better.

This is my daughter who loves to help me bake. And guess what? Now I have someone new to hide food from. Life has come full circle, though I have to say she’s more adept at finding me out than my parents were. The child can sense chocolate or sugar from a mile away. I don’t know where she gets it.

Valrhona Chocolate Cookies with Reese’s Peanut Butter Chips

(Adapted from Nestle’s Best-Ever Cookies)

2 1/4 C. All purpose flour

1/2 C. Valrhona cocoa powder (or similar Dutch-process cocoa)

1 tsp. Baking soda

1/2 tsp. Salt

1 C. Butter, softened

1 C. Brown sugar, packed

3/4 C. Granulated sugar

1 tsp. Vanilla extract

2 Eggs

1 10 oz. Package Reese’s peanut butter baking chips

Combine softened butter, brown and granulated sugars. Beat on medium speed until thoroughly combined with no visible sugar crystals. Add vanilla and eggs, one at a time. Add salt, baking powder, and cocoa. Mix thoroughly. Add flour a half at a time, mixing on low speed until just combined. Add chips, mix lightly. Chill a few hours or overnight. Preheat oven to 375, portion 1 1/2 inch balls of cookie dough. Bake 8-10 minutes until edges are cooked and centers are still slightly doughy.

Momofuku: The Bakery That Sounds Like a Swear

Has this ever happened to you? You see a complicated recipe, decide to try it, and realize you don’t have the required ingredients. So you make substitutions with what you have, and then are dismayed when the end result looks nothing like the original. It happens to me all the time because I’m frugal, and I don’t like to buy special ingredients that I know I’m only going to use one time.

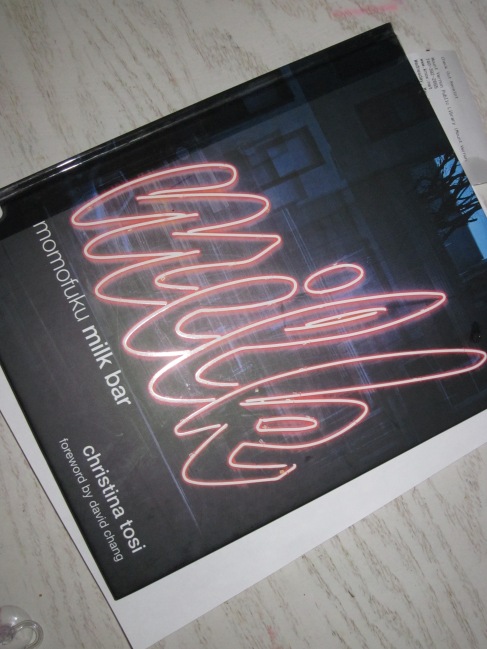
Enter Milk, The cookbook from Momofuku’s pastry chef extraordinaire, Christina Tosi.

Image

I can’t possibly tell you how excited I was about this book. I requested it from my library (see: frugal, above), and bugged them every day to see if it was in yet. I read it cover to cover. Ms. Tosi’s story of how she came to be one of the most celebrated and innovative pastry chefs in the United States is as interesting as the pictures of her food are beautiful. I couldn’t resist trying one, and so I decided on the Chocolate Malt Layer Cake. I have a deep love of all things malt (except liquor; never tried it), so I knew this was the cake for me. And for once I decided to do it by the book, to buy every special ingredient and equipment.

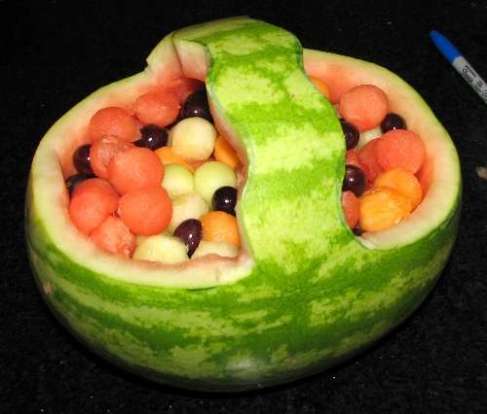
The problem is that I live in a very small town. Our idea of fancy is cutting watermelons to look like baskets for baby showers.

Image

(No, I didn’t make that. Sure is fancy, though!)

Try as I might, I could not find European butter (with a fat content of 82% compared to American butter’s paltry 81%), a 6-inch cake ring, or acetate to hold the cake together. This did not bode well because I am notoriously bad at making things look good. It’s why I never got into cake decorating. No matter how hard I try, my cakes always lean, my icing slides and plops–it’s a distressing dilemma for someone who loves baking as much as I do. Hello, my name is Vanessa, and I make ugly cakes. There, I said it. Feels good to get that off my chest.

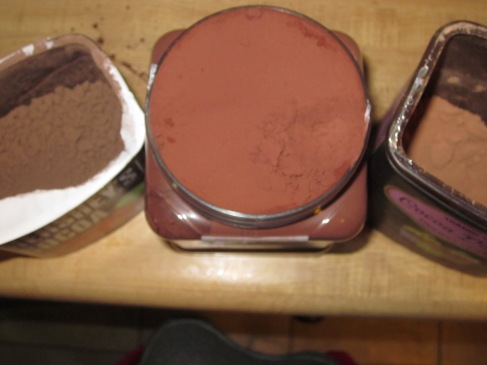
One thing I did purchase especially for this cake is Valrhona cocoa powder. If you followed my previous posts, then you may remember that Valrhona is an export from France. It’s real chocolate with no non-food chemical additives. The cocoa powder is Dutch processed, or alkalized, to remove some of the acidity. Here’s a comparison of the three cocoa powders in my cupboard.

Image

Image

I was interested to see if Valrhona would look or taste different compared to the others. It does. Note how the powder is refined and reddish brown, not chunky or chalky like the others. (Though I should note that the Trader Joe’s brand is not Dutch process. The two are not interchangeable; take my word for it and never try Dutch process cocoa powder in no-bake cookies. Ick.) I tasted the Valrhona cocoa powder straight from the tub, and it tasted like ground cocoa nibs–smooth, chocolaty, and with no bitterness. Now, back to the cake.

There are several steps to this cake that, for a large bakery, probably become routine, sort of like a human production line. I’m sure they have people who are dedicated to making the crumb topping, people who do the cake, and other people who make the sauces. For the home cook, we do it all. I stretched it over a few days. Day one, I made the crunch–a mixture of milk powder, melted butter, Ovaltine, and white chocolate.

Image

Day 2, I made the sauce. This is the sauce that goes in the cake, not to be confused with the sauce that goes on top. Think of this sauce somewhere between hot fudge and Hershey’s syrup. It made extra, and it was excellent on ice cream. I forgot to take a photo of this. Instead, here are some of the many ingredients used in this cake.

Image

I don’t know why that’s important, but it seemed like a very “blogger” thing to do.

Day 3, I baked the cake, toasted the marshmallows, assembled, and made the malt sauce to go on top.

This is where I tried to get fancy and use my butane torch like a real chef, but my tech-savvy husband wasn’t home to help, and I couldn’t get it to work.

Image

I used the broiler instead.

Image

Notice the Silpat, another export from France, and a must for every serious home cook. It’s one of my most-used tools. I bake cookies on it, make candy on it, pretty much everything that would be sticky doesn’t stick to it. You can bake at high temperatures or freeze it, and it lasts for years.

The cake was supposed to be baked in a sheet pan and then cut out using a 6-inch ring. For assembly, it was suggested to use acetate to wrap around the cake and keep the layers from sliding. I couldn’t find either of those things. Instead, I baked the cake in 2 8″ rounds. They didn’t come out. (See: I make ugly cakes, above.) Assembly was a wreck–everything slid off. I had high hopes when the first layer came together and looked pretty.

Image

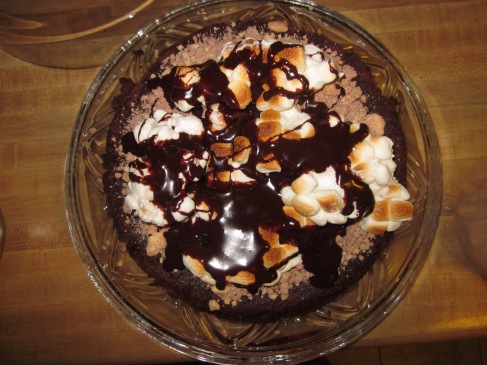
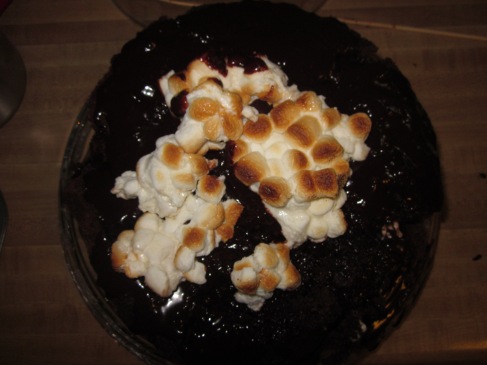
Here is the finished product.

Image

Image

Man, that is one ugly cake. But unattractive cakes, like many unattractive people, are often filled with good things on the inside. I don’t know how ugly people taste, and I never want to find out, but this ugly cake tasted DELICIOUS!

Image

*Apologies for not posting the recipe, but copyright infringement and possible prison, blah, blah, blah. Perhaps I’m not dedicated enough to my art if I’m not willing to go to prison to bring you this post. Something to think about. If you’re interested, look for Milk at your local library; I promise it’s worth your time!